What Does a Tree Service Do?

Tree service consists of an array of professional tasks that ensure the health and safety of trees. Improving aesthetics and property value is crucial in urban and rural landscapes.

Before hiring a tree service, ensure they have professional organization credentials and are licensed and insured. Also, ask them to provide you with a written price quote. Click the Tree Service Chula Vista to learn more.

Trees are vital to the health, beauty, and sustainability of landscapes. Proper tree care and maintenance promotes plant growth, supports healthy trees, and minimizes the risk of limbs falling during severe weather, keeping property safe for people and animals alike.

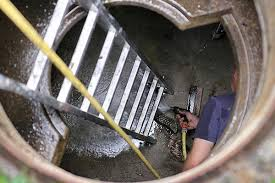
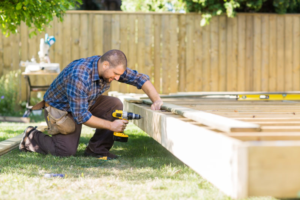
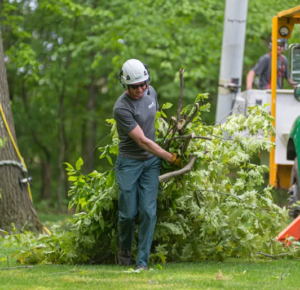
A competent tree service evaluates specific tree needs and offers customized solutions, such as thinning, pruning, and stump grinding. Its experts also perform routine services like mulching, insect monitoring, and seasonal cleaning. They also provide emergency service to address storm damage, wildlife concerns, and more.

Consistent seasonal tree services support the long-term health and vigor of your landscaping investment. During the spring and summer, tree services may monitor for signs of disease or pest problems, prune branches to prevent falling debris during storms, and mulch to retain soil moisture. They may also inspect a tree for structural weaknesses and recommend additional services to protect it from winter damage.

When hiring a tree service, make sure the professionals are certified arborists. Look for the ISA (International Society of Arboriculture) logo to ensure that the company is trained and qualified to do work on your landscape. In addition, look for a tree service that employs best practices, such as refraining from topping, which is harmful to trees and creates weak branches prone to failure.

During the winter, tree service professionals protect against ice and snow damage by pruning vulnerable branches, wrapping sensitive species, and removing dead leaves. They can also help you select and install new trees to complement your existing landscape.

A skilled and reputable tree service will be knowledgeable about the needs of local trees, including soil conditions, water availability, and cultural factors. They will be able to suggest the best tree species for your site and offer tips for proper planting and care.

Gonzalez Tree Service and Maintenance is an experienced residential tree service provider in Staten Island. Its team of tree specialists provides pruning solutions to improve a tree’s aesthetic appeal, as well as remove and grind tree stumps. Its professionals are licensed and insured, and have over five years of experience in the industry. They are also equipped with equipment like spider lifts and bucket trucks for added safety.

Tree Removal

Tree service professionals specialize in the care and maintenance of trees, shrubs, and other plants in residential and commercial landscapes. They are trained in a wide range of essential care practices, including pruning to promote healthy growth and addressing disease-causing agents. They also have a deep understanding of tree physiology, allowing them to accurately diagnose and treat health issues. In addition, they work within local regulations when it comes to tree removal and other emergency services.

Whether it’s a small shrub or a large shade tree, the health and well-being of these plants are important for property aesthetics, climate regulation, and wildlife habitat. Through routine care, Tree Service can ensure that trees remain attractive, safe, and healthy throughout their lifespan.

Tree services can be used for a variety of purposes, ranging from minor trimming and pruning to more serious problems like tree felling or stump grinding. The latter involves using specialized equipment to grind down remaining tree stumps, preventing them from becoming tripping hazards or breeding grounds for pests.

Professional Tree Cutting and Removal

Taking down a tree is a complex process that requires the right training and expertise to do properly. It’s not something that can be done by homeowners, as misjudging a fallen tree’s direction can lead to severe injuries or costly property damage. Tree Service professionals are skilled at assessing each tree’s structure and determining the safest method for removal. They can also remove a tree in sections, avoiding potential damage to homes or power lines.

It’s a good idea to interview several different tree service providers to learn about their experience, pricing, and approach to the project. It’s also a good idea to check their credentials, such as business and contractor licenses and insurance coverage. This will help you choose the best company for the job. Also, it’s a good idea to check out customer reviews of the companies you’re considering. You may be able to find some useful information online or in a local directory.

Stump Grinding

Stump grinding involves the use of heavy machinery to grind the stump down. The machine uses a rotating cutter wheel to shred the roots into smaller pieces, which can then be removed from the yard or used as mulch. It is a faster and more efficient way to remove the stump than digging it out, and is a good option for homeowners who want to avoid hiring a contractor.

The service can also reclaim the space occupied by a tree, providing room for new plants or lawns. It can also be used to prevent trip-and-fall accidents by clearing away a hazardous tripping hazard. It can even improve a property’s aesthetics and increase the value of a home by improving curb appeal. Moreover, it can reduce the risk of fire damage to surrounding trees and shrubs by preventing the spread of fire to them.

It offers a wide range of services that include pruning, trimming, and cutting for residential and commercial properties. Its arborists perform comprehensive tree structure evaluations and provide tree care services such as plant health inspections and insect management solutions. The company can handle large scale projects, including removing diseased or dead trees and installing new ones. Its experts are available 24 hours a day to provide emergency tree service.

An arborist is a professional who has been trained and educated in the care of trees and woody shrubs. They can diagnose problems with trees and other plants, recommend treatments, and provide advice on the right nutrient mix for trees. They can also prune or trim trees, and perform soil testing to help determine the best placement for trees. They can also remove stumps and conduct emergency tree service.

Manhattan Tree Services provides tree removal, cutting, and stump grinding services to homeowners in New York City. The company also provides yearly inspection services for both residential and commercial properties. Its professionals are licensed, insured, and experienced in performing tree services. They can work on any size of trees and own some of the industry’s largest stump grinder machines. Its team can also handle emergency tree service requests, such as repairing damaged trees and cleaning up storm damage.

Tree Planting

Tree planting is a big commitment to your landscape and can have significant impacts. Tree service professionals will help ensure the proper selection and planting of trees so that they thrive for years to come. They understand the unique needs of each type of tree and your specific climate, allowing them to create the perfect environment for growth.

Adding trees to your yard or commercial property improves the quality of your outdoor space by adding visual appeal and creating a healthy environment for other plants and animals. Trees are also beneficial to soil health, stabilizing soil and reducing erosion and runoff, while enhancing the appearance of your property. Trees can also add value to your home or business and can make your property more attractive to prospective buyers.

Tree services are more than just cutting and removal, they can provide preventative maintenance and cleaning to keep your trees and shrubs healthy. Keeping your trees and shrubs free of pests, disease, and unwanted growth will allow them to grow stronger, live longer, and look their best. Tree trimming, pruning, and regular upkeep are a great way to maintain the health of your landscaping while maximizing the enjoyment and benefits that it provides.

A professional tree service company will be able to perform these tasks more efficiently than you can when trying to do it yourself. This saves you time and stress and allows you to focus on other tasks. They can also provide advice on how to care for your trees and how to maximize their benefits.

When hiring a tree service, look for a certified arborist who has extensive knowledge of the best practices in tree planting. Ask for references and a consultation before choosing a tree service provider.

When a tree is planted incorrectly, it can lead to costly problems in the future. Common errors include placing the tree too close to buildings, outdoor structures, or power/utility lines. Poor placement can also result in overcrowded canopies or root damage to foundations. Professionals will carefully plan the location of each new tree, taking into account its mature size and root structure. They will also make sure that the area has adequate sunlight and wind protection, as well as the proper depth for drainage. They will also use mulch to help keep the roots cool and improve water absorption, preventing root heaving and damage to nearby properties.

Boost Your Home’s Curb Appeal With New Siding

Siding sheathes homes and other structures, protecting them from harsh environmental elements and locking in both heat and cold. It can also boost curb appeal and enhance property value, but each material has different upfront and long-term costs, maintenance requirements and durability.

A siding contractor can help you choose the right material for your project. Consider your needs, budget and long-term value when making a decision. Click the https://sidingrepaircharleston.com/ to learn more.

Whether you’re looking to increase your home’s value or simply want to make it more appealing, the right curb appeal can have a significant impact. While some improvements like a fresh coat of paint can add visual appeal, others such as a siding replacement offer a more transformative effect. In fact, a study by the Journal of Real Estate Finance and Economics found that re-siding can significantly boost your home’s appraisal value. But determining the best exterior enhancements for your house requires careful consideration of cost-effectiveness and resaleability.

Siding plays a pivotal role in your home’s overall aesthetic and can define its personality. Choosing the right color can make a dramatic difference in your home’s curb appeal, and there are many options to choose from. From earth tones that blend seamlessly with natural settings to bold hues that make a statement, there’s sure to be a color to suit your personal taste.

You can also enhance your home’s appearance with a variety of trims and accent features. The addition of a trellis or pergola can create an inviting entrance, while vertical lines of board and batten siding provide a farmhouse-inspired look that’s perfect for gable ends. Other coordinating accents like window shutters and eaves, shutter boxes, and doorbells can add the finishing touches to your home’s facade.

A well-kept yard is a major component of your property’s curb appeal. Plants that complement your siding color and architectural style can create a balanced and inviting ambiance. Tall trees can frame your house and block out distracting noises, while low ground cover can define pathways and soften the edges of your lawn.

Adding or replacing siding can transform your home’s entire appearance and dramatically improve its curb appeal. However, a full re-siding project can be expensive and may not be feasible for homeowners with limited budgets. For this reason, we recommend consulting with a professional to learn more about the latest siding trends and how they can elevate your home’s visual appeal while boosting its appraised value. We’ve helped countless homeowners with a wide range of projects from modernization to complete overhauls and can help you determine the best solutions for your home.

Insulation

When you think about a cozy and energy-efficient home, insulation comes to mind. This is important because it curtails heat transfer between your home and the outside environment, allowing your HVAC system to use less energy to maintain an ideal temperature for year-round comfort. This can result in substantial savings on your energy bills.

Many siding materials are a good insulator, but there is one material that goes above and beyond all others in this regard: fiberglass. This type of insulation has a high R-value and is available in different thicknesses to provide the optimal level of insulation for your home. It also does not absorb water, which can cause moisture issues and damage the structure of your home.

In addition to enhancing your home’s resale value and boosting its curb appeal, siding can also improve your home’s energy efficiency. The R-value of your siding plays a significant role in its ability to regulate your indoor temperature, and choosing the right material will make your home more energy efficient.

For example, Hardie Board has a very high R-value and is an effective insulator, while vinyl siding has a low R-value but still offers a significant amount of energy savings. It is also more resistant to impact than other siding materials, so it can protect your home against heavy wind and hail that can otherwise damage walls.

Insulating your siding is an excellent idea, especially if you are updating your exterior with new vinyl or fiber cement siding. These types of siding have built-in insulated sheathing and can be combined with other insulating products, such as foam board, to boost your home’s R-value even further.

Blown-in, flat foam and insulated vinyl siding are also popular ways to add more insulation to your exterior walls. All of these solutions are relatively easy to install and offer a variety of benefits, including lower energy bills and reduced condensation risk.

Adding additional insulation is an excellent idea, but the best time to do this is during a remodel when you are replacing your existing siding. This is because your old insulation will either be removed or covered up during the upgrade. This is a great opportunity to fill in any gaps or leaks that may be causing energy loss in your home.

Durability

The durability of a siding material is an important factor in its ability to increase the value of a home. A well-chosen siding that is built to last can protect against moisture damage, pest infestation and even structural problems. The right siding can also provide a range of modern, stylish options to complement any architectural design and aesthetic.

The longevity of your siding will depend on the materials you choose and how well they are installed. Vinyl siding, for example, is extremely durable and typically lasts 20-40 years with minimal maintenance. This is a great option for homeowners in the Chapel Hill area because it resists UV damage and can withstand a variety of weather conditions. It is also easy to maintain, requiring a simple cleaning regimen and occasional repairs.

Another popular siding choice is fiber cement, which is a blend of Portland cement, cellulose (wood), and fly ash. This material offers superior strength and resistance to termite, fire, rot and hale damage. It also requires minimal maintenance and can withstand temperature fluctuations, reducing the risk of warping. This type of siding is also environmentally friendly and requires less energy to produce than wood options.

Brick siding is another highly durable and low-maintenance option that increases the value of a home. Although it has a higher upfront cost than other siding materials, its longevity and durability offset the initial investment over time. It is also resistant to rot, fire and pests, making it an attractive option for homeowners in rainy regions.

There are also a number of non-wood synthetic options that are becoming increasingly popular in the marketplace. This newer class of siding includes products like LP SmartSide, which uses engineered wood strands that can help resist moisture, fungal decay and termite damage. It can also be treated with zinc borate to offer additional protection against fungus and other environmental hazards.

No matter which material you choose for your siding, proper installation and regular maintenance are essential for long-term performance and a high return on investment. Neglecting minor issues can allow moisture and pests to penetrate your siding, leading to costly damages that affect your home’s value. A siding professional can recommend a maintenance schedule and offer advice on preventing common issues like loose panels and cracks.

Maintenance

Siding does more than improve your home’s appearance; it also serves several key functions, such as insulation and weather-proofing. In many areas, homeowners can significantly increase the value of their property by re-siding. A re-siding project is also an excellent opportunity to upgrade other aspects of your house’s exterior, such as windows or landscaping, which can boost your home’s overall curb appeal.

Choosing the right siding for your home depends on a variety of factors, such as your budget and aesthetic preferences. It is also important to understand the various maintenance and repair requirements for different siding materials. Once you’ve narrowed down your options, consider asking a professional for guidance and recommendations.

If you choose wood siding, for example, make sure that the contractors you work with are licensed and insured. In addition, ask about their experience and check references. During the installation process, look for signs that the job was not done correctly, such as nails that are rusty or sticking out of the wall. These can indicate moisture damage, which should be addressed as soon as possible to avoid expensive repairs and replacements in the future.

Brick siding, on the other hand, requires minimal maintenance and is resistant to fire, rot, and pests, making it a cost-effective choice for homeowners. It is also energy efficient, helping to lower your utility bills. However, the upfront cost is typically higher than other types of siding.

Homeowners can finance their siding projects through a variety of methods, including using a credit card or personal loan. It is important to compare the rates and terms offered by each option to find the best deal. Additionally, homeowners should be aware of the impact that financing will have on their long-term costs. If you plan to use a credit card, it is advisable to pay off the balance as quickly as possible to avoid interest charges. Alternatively, some contractors offer financing through their companies, which may provide competitive rates and terms.

The Importance of Proper Septic Tank Installation

The septic tank is where all the wastewater from your home goes to be pre-processed. Once the septic tank is full, bacteria decomposes the remaining waste and liquids drain out into a drain field or absorption system.

Avoid flushing non-biodegradable items such as cigarette butts, cotton buds/swabs, menstrual hygiene products and condoms into your septic system. Also, don’t do excessive loads of laundry back-to-back as this could overflow your septic tank and/or drain field. Contact Septic Tank Armadale now!

A septic tank is an underground storage chamber through which wastewater from your home flows. This system is designed for homes that are not connected to a public sewer and provides basic sewage treatment before the waste is dispersed into your soil. The septic tank is filled with waste, then microbes and enzymes begin to break it down.

A typical septic tank has three general components: solids or sludge, floatables, and a layer of water. The sludge is at the bottom of the tank and is made up of fats, oils, and other substances that will not dissolve in water. The floatables or scum layer is found on top of the sludge. This is where toilet paper, sanitary products, and other non-biodegradable items reside. Finally, the liquid layer is known as effluent and is the clean wastewater that is sent to your drain field or leach field.

Bacteria and other microbes live in the oxygen-free environment of your septic tank and perform the first stage of sewage treatment, generating gas and breaking down sludge into a liquid form. This process also deactivates many disease germs that could otherwise infect people.

The liquid effluent is then pumped out of the septic tank and into the drain field or leach field. The treated wastewater is then absorbed into the ground by bacteria. This is why it is important to only flush human waste and toilet paper down the drains and not cigarette butts, cotton swabs or q-tips, menstrual hygiene products, condoms, and other materials that can cause your septic tank to overflow and clog.

Depending on where you live, you may be required to get your septic system inspected regularly. Inspectors check the condition of your pipes, if there is any leaking and make sure there are no issues with the venting or drainage.

It is crucial to have your septic tank inspected and serviced by professionals who are licensed, insured, and certified. This will ensure that your septic system works correctly and will prevent costly repairs in the future. If your septic system isn’t serviced properly, it can lead to dangerous groundwater contamination. This is especially true if you live in an area with a lot of clay or rock.

Septic Tank Installation

Whether you have a new home in the country or you’re moving to a new property that requires an off-mains sewage system, working with a professional will ensure your septic tank is installed properly. An incorrectly installed septic system can lead to costly repairs and environmental contamination.

A septic tank is a buried water-tight container made of concrete, fiberglass or polyethylene. It’s large enough to hold the total sewage from one or more homes, typically a two-bedroom home will require a tank that holds 1,000 gallons of waste water. A septic tank that’s too small will not be able to sufficiently separate solids from the wastewater. Solids settle down to the bottom of the septic tank, forming sludge while oil and grease floats to the top, where it forms a layer called scum. The liquid wastewater (effluent) exits the septic tank, traveling to the soil absorption field or drain field.

The septic tank removes solids from the wastewater, protecting the soil absorption field from clogging and early failure. It also decomposes or breaks down disease germs in the sewage, reducing the amount of sewage that enters local waterways and lakes.

When bacteria break down the sewage, it generates gases, including hydrogen sulfide, which smells like rotten eggs. To reduce odors, the septic tank has a vent that opens to the outside air. The vent pipe is usually fitted with a filter to reduce odors entering the home.

Once the solids have accumulated in the tank, bacteria start to break down the waste. Over time, the septic tank will become almost empty.

It’s important not to add solids to the septic tank that could interfere with this process. Adding yard debris, tree roots or animal bones can prevent the tank from working as it should and can cause clogs in the drain field.

A septic system is an efficient way to treat wastewater and protect the environment. It keeps untreated sewage from contaminating lakes and rivers downstream from residential areas. It also helps keep groundwater clean, which many people rely on for drinking water.

Septic Tank Pumping

The septic tank should be inspected on an annual basis to ensure it is operating properly. If the septic tank is overflowing, it should be pumped immediately to avoid sewage backup into your home. The septic tank also should be pumped before the sludge and scum build up to the top of the liquid waste. When this occurs, the septic tank is overfull and unable to process incoming sewage, which can then clog the drain field.

The liquid sewage flows from your house through a pipe into the septic tank, where it is filtered by the soil. A septic tank is typically large enough to contain the wastewater from three or more households.

Once the septic tank fills, it needs to be pumped regularly to prevent sewage backup into homes and environmental contamination. The septic tank is filled with slow-biodegradable organic solids (feces), fast-biodegradable organic solids (toilet paper, kitty litter) and non-biodegradable solids (plastic, tin foil, etc). The faster the household produces waste, the quicker the septic tank fills and needs to be pumped.

When a septic tank is pumped, a professional removes the floating solids and sludge and disposes of them. During the pumping, the technician will check for signs of problems such as cracks or leaks and recommend any repairs needed to your septic system.

The tank’s contents are then pumped into a drainage receptacle, which is a porous pipe that goes into the soil to disperse the liquid waste. As the water soaks into the soil, a natural biological process digests any remaining sludge and solids. The resulting liquid is called effluent.

Some septic systems use pumps or gravity to help the effluent trickle through sand, peat or other organic material, constructed wetlands and other media to further purify it before it is discharged into the environment. These systems may be more environmentally friendly than conventional septic tanks. However, the effluent still carries pathogens, which can contaminate groundwater supplies. These systems are generally more expensive to install and require ongoing maintenance.

Septic Tank Repair

Septic tanks have numerous parts, so it’s possible that something will break or wear out over time. You can often catch these problems early with regular maintenance. Signs of a faulty septic system include pooling water, sewage odors in your home or yard, and clogged drains. If you see any of these signs, call a septic tank repair professional to investigate.

Septic tank repair costs vary based on the type of problem. For example, a cracked lid can cost more to replace than a crack in the side of the tank. A broken septic tank baffle or effluent filter may also be more expensive to fix than a hole in the tank itself. The best way to estimate how much a septic tank repair will cost is to contact the same company that oversees your tank’s pumping schedule. Many septic companies have flat fees for most repairs, and they will charge a fee for any additional inspection work that is needed.

Most septic tank repair costs are less than replacing the entire system, but replacement is the only option if your tank has completely failed. If your septic tank is damaged, it can’t hold wastewater or sewage, which can cause waste to back up into your home, contaminating groundwater, surface water, and your yard with bacteria, viruses, and foul smells.

Some septic tank problems can be prevented, especially by cleaning your drains regularly. If you are concerned that your septic tank is overflowing, this typically means that it’s full and needs to be pumped. It can also indicate a serious clog or leak that requires more costly repairs.

Other common preventive measures include planting grass and shallow-rooted plants over the absorption field and keeping trees, shrubs, and other tall plants away from it. These plants can grow into pipes and clog them. It’s also a good idea to conserve water, as this will help your septic system work more efficiently. You can also reduce your septic tank repair costs by using water-saving appliances and fixtures. In addition, installing a rain barrel can help to protect your septic tank and absorption field from excess rainfall.

Important Responsibilities of a General Contractor

For construction projects, general contractors are the primary contact points between property owners and their subcontractors. GCs have several important responsibilities before, during, and after construction that helps projects run smoothly.

During the construction phase, GCs oversee project progress, ensuring timelines are adhered to, and quality standards are met. They also manage the flow of materials and personnel throughout the site. Contact General Contractor Lexington KY now!

Project planning is the initial phase of a construction project that determines its scope and feasibility. It involves identifying stakeholders and determining their expectations, assessing risk factors, and establishing a timeframe and budget for the project. It also includes evaluating and selecting materials, equipment, and sub-contractors. A general contractor works with architects and engineers to assess the constructability of the design, obtain essential permits, and secure necessary approvals.

During the planning stage, the contractor addresses any changes that may affect the project timeline and budget. This can be due to unexpected occurrences or design modifications. Keeping open lines of communication allows the team to communicate with the client about these issues and find suitable solutions in a timely manner.

The GC also prepares a work breakdown structure (WBS), which breaks the project into smaller, more manageable tasks or “work packages.” This allows the construction team to better understand and prioritize each task and its interconnections. The GC is also responsible for determining how much of the work will be performed by the onsite workers and how the remaining work will be performed offsite by sub-contractors. This information is crucial to managing the onsite team and coordinating the delivery of materials and equipment.

Another aspect of the planning process is developing a schedule for completing the work, including milestones and key deliverables. The GC also evaluates the resources needed to complete each task and determines whether the project is within budget. This can include analyzing historical data and assessing the risk of overruns and cost overruns. Using a project-focused software is essential to ensuring that projects stay on track.

The GC selects contractors to perform the work by evaluating bid proposals and engaging in negotiations. The GC often uses a selective bidding process, wherein the number of selected bidders is limited to ensure competitive pricing. This method is more common for specialized projects such as industrial buildings, which require expertise and a higher level of skill than speculative housing. This approach also mitigates financial exposure and limits the GC’s liability. In addition, a GC may choose to use a guaranteed maximum price contract, which limits an owner’s financial exposure to the sum of all cost overruns.

Project Execution

A general contractor has to be able to manage people and projects. This includes ensuring that everyone is doing their work correctly and addressing any issues that may arise. A good GC will be able to resolve these issues quickly and effectively and will also make sure that all deadlines are met.

Project planning is a major part of the job as it ensures that the construction project can be completed within the stipulated time frame. This involves dividing the large project into smaller tasks and identifying timelines for each task. A GC can also assist with the design phase and provide cost projections for the project.

Once the project plan has been finalized, the construction process can begin. This includes site preparation, framing and building, plumbing and electrical, and landscaping. It is the GC’s responsibility to arrange for any necessary permits and inspection requests to be made. This also includes arranging for subcontractors to come in and perform their specialized jobs.

During the construction phase, the GC must monitor the quality of work to ensure that it meets specifications and is up to code. They also have to keep an eye on the budget and ensure that all costs are managed properly.

In design-build projects, a GC must be able to collaborate with the architect and engineer to develop the design and to establish a timeline for the ensuing construction. They also need to be able to meet with clients and discuss their needs and preferences, which can help them determine the best design for a particular project.

Another important aspect of the role is negotiating and purchasing materials. A GC can often negotiate with vendors and suppliers to get better pricing on materials, which is particularly useful for larger commercial projects. Having these connections can save both time and money for the project.

The most important job function is ensuring safety on the construction site. GCs must be familiar with all the applicable construction codes and regulations. This includes providing proper training to employees, implementing and updating safety procedures and protocols, and ensuring that all workers are following safety guidelines at all times.

Sub-Contractors Management

The success of a construction project hinges on the subcontractors’ ability to carry out the work to client specifications and meet quality standards. During the planning and contract negotiation phases, GCs establish clear benchmarks to systematically evaluate the quality of each subcontractor’s work. This ensures that the work meets both the overall project goals and the vision of the client.

When the quality of one subcontractor’s work deteriorates, it impacts the entire project. A quality issue in one trade may delay the completion of another trade’s work and increase project costs. Furthermore, if the work isn’t of acceptable quality, it could necessitate tearing out other areas of the build to access and repair the shoddy work.

Managing trade subcontractors requires a team of professionals who work together to address challenges quickly and effectively. GCs, project managers, general counsel, risk managers, CFO/controllers and site superintendents all play important roles in the management of project risks and issues related to subcontractors.

To mitigate potential problems, GCs set clear expectations and responsibilities in the contract negotiation process, which sets the tone for a productive relationship throughout project execution. They also define and agree upon the scope of work, payment terms, project milestones, dispute resolution mechanisms and other key business terms. This helps avoid misunderstandings, reduce the likelihood of scope creep and ensures that the subcontractors are committed to meeting their part of the project objectives.

Additionally, a GC monitors sub-contractors’ budgets and expenses throughout the construction process to identify and address variances early on. This prevents unwarranted cost overruns, which can significantly impact the project’s profitability and timelines.

A GC also encourages collaboration between subcontractors by organizing regular meetings, or daily jobsite huddles, that bring all relevant subcontractors together to discuss project progress and updates, discuss concerns and promote communication and teamwork. This streamlined approach increases coordination, eliminates bottlenecks and reduces the time it takes to resolve issues. It also helps to maintain a safe work environment and avoids conflicts that can lead to legal disputes, claims and other costly problems.

Dispute Resolution

General Contractors need to work with legal counsel to craft dispute resolution strategies that are in line with the project’s contract and industry standards. These dispute resolution strategies are often included in the contract documents (AIA Contract Documents) and help to preserve relationships and maintain progress on projects. This approach is particularly beneficial to GCs because it can save time, money, and potentially relationships in the case of disputes or litigation.

There are many different methods of dispute resolution, which can vary from consensual to adjudicative processes. Consensual processes involve direct dialogue between the parties involved in the dispute. It’s a process that is similar to how people sort out their differences in everyday life, such as when they argue over who should have the car keys and when they should return home.

Dispute resolution also includes mediation, which involves the facilitation of discussions between disputing parties in a neutral environment. Mediation is a less formal and more cost-effective alternative to litigation, as it can resolve disputes within a few weeks or months. It can also be more effective in terms of preserving relationships and improving satisfaction levels on projects.

Arbitration is another method of dispute resolution that is more formal and legally binding than mediation. It involves the submission of evidence from all parties, and the judge will then make a final decision that is enforceable in court. However, if both parties are not satisfied with the outcome of the arbitration, they may be able to appeal it to a higher court.

Litigation is the most formal and expensive form of dispute resolution, and it involves a trial where a judge will rule on the case. If a judgment is issued, it will outline the legal rights and obligations of the successful party, and will be enforceable by the courts.

For most people, the best way to resolve a dispute is by using negotiation. Whether it’s about who should get the car keys or when to return home, most people can find an agreement by talking it over together. This is a great way to avoid costly arbitration and litigation, and it will also keep the project moving forward.

How Property Managers Can Optimize Their Paving Projects

Paving is the process of installing a new road or parking lot. It requires specific steps to ensure structural integrity and durability.

Asphalt paving involves applying an aggregate and binder layer to the surface. A specialized machine called an asphalt paver is used for this step. Contact a Paving Companies Summerville SC now!

Compaction is a crucial part of the paving process. This helps to improve density and reduce voids, which can cause future problems.

Paving uses a variety of materials. Some, like concrete and asphalt, are popular because of their durability and affordability, while bricks and stones are chosen for their classic and timeless appearance. Thoughtful material selection allows Property Managers to optimize their paving projects based on their unique priorities and goals.

Asphalt is a sticky, black, semi-solid petroleum used in road and driveway construction. Its composition typically includes aggregates (crushed stone or sand), a binder, and fillers. Aggregates provide strength and stability to the asphalt pavement, while the binder, which is usually asphalt cement, acts as a glue to bind the aggregates together. The fillers, which are fine mineral powders, help to fill voids and improve the overall workability of the asphalt mixture.

Concrete is a popular choice for commercial paving because of its versatility and durability. It can be molded into many different shapes and sizes, allowing for the creation of complex designs and patterns. It also resists fading, cracking, and chipping, making it an ideal choice for outdoor use.

Natural paving stones are another durable and attractive option. They can be more expensive than other types of paving materials, but they will last longer and are a great addition to any home or business. Recycled concrete aggregate, or RCA, is another sustainable and affordable alternative to traditional crushed stone. It is created by grinding and crushing existing concrete and then mixing it with sand.

Site Preparation

Site preparation is a crucial step in the construction process, whether you’re building an apartment complex or a commercial parking lot. It ensures that the surface is structurally sound and ready to bear heavy loads. It can also help address zoning hurdles and other issues that could delay your project.

A good site prep team will first survey the land to determine its suitability for your project. They’ll evaluate the soil composition, drainage patterns, and other factors that will affect the project’s success. Then, they’ll create a work plan that will take these factors into account.

The next step is to prepare the subgrade for paving. This typically involves excavating the area, removing unsuitable soils, and compacting the sub-base to achieve stability and uniformity. The base material layer is then added to provide additional support and improve the durability of your paved surface.

After the base material is placed, the surface must be fine-graded using specialised machinery. This will smooth and level the surface, removing high or low spots and creating a consistent slope for proper water drainage.

Your site prep partner can also install or repair drainage structures to prevent water damage and flooding. This may include gutter systems, drains, or retention/detention ponds. Clearing the site is another important aspect of site preparation, as it removes any debris or obstacles that can hinder paving. It also helps minimise fire hazards and improves safety by eliminating tripping or other safety risks.

Mixing

The quality of the concrete mix used for paving slabs has a significant impact on their strength and durability. The wrong mix can lead to weak and unstable slabs that don’t stand up well to heavy foot traffic or weathering. In addition, a poorly mixed concrete can create uneven textures and pits in the finished product that detract from its aesthetic appeal.

For paving slabs, a standard 1:2:4 ratio of cement, sand and gravel is ideal. This is suitable for most patios and garden paths and offers a good balance of strength, durability and workability. For more robust projects, a higher cement content can be added to the mix, resulting in a stronger and more resilient slab.

When mixing, it is important to keep an eye on the consistency and avoid adding too much water. Excess water dilutes the concrete mixture, reducing its strength and leaving it more porous and vulnerable to cracking.

The bedding mortar for paving is usually made from a mortar mix that contains four parts sharp sand to one part cement. This is a relatively low-strength mix that can be worked with by hand, but for larger jobs it may be more efficient to use a concrete mixer. It is also a good idea to apply a priming slurry to the bedding before laying. This will improve adhesion and bonding between the bedding mortar and the paving slabs.

Compaction

Compaction is the process of mechanically compressing soil, aggregate, or asphalt to eliminate air voids and increase density. It is a critical step that paving contractors use to ensure quality pavement construction, minimize road maintenance, and create a smooth driving experience for motorists.

When properly performed, HMA compaction increases material density, which reduces rutting and fatigue. It also improves stability, preventing surface distress caused by freeze-thaw cycles. Properly constructed compacted roads provide a long-life flexible pavement structure that requires little maintenance.

The most important factors in HMA compaction are the temperature of the mix and the ambient air temperature when it is laid by the paver finisher, according to Jerod Willow, proprietor of Willow Designs, East Berlin, Pa. Contractors must try to lay the mix before it cools below its limit of workability, which is based on the temperature of the asphalt cement binder and the aggregates used in the mix, as well as other variables such as moisture content, wind velocity and the thickness of the layer being laid.

When the soil is being compacted for paving, it is first spread evenly with a loader or larger tracked machine equipped with a spreader bar and then wetted. Moisture is important for proper compaction because it helps soil particles slide against each other and bind together. Without it, soil might not be dense enough to support the underlying HMA.

Curing

When asphalt is cured, it becomes more durable and resilient against wear-and-tear from weather elements and heavy usage. During this process, the volatile oils within your asphalt mix evaporate, leaving behind fully hardened asphalt that can resist damage and last for years.

The curing process can be affected by various factors, including temperature, humidity, and the composition of your asphalt mixture. High humidity levels can lengthen your curing time because they prevent the asphalt from drying out properly. Similarly, temperature changes can impact the curing process by causing rapid hydration and shrinkage in the concrete.

Once the asphalt has fully dried, you can start using it for traffic and other purposes. However, it is important to avoid putting heavy or sharp objects on the surface until it has completely cured. This is because premature use can cause ruts and depressions in the newly paved asphalt.

To expedite the drying process, you can spray a curing agent onto your asphalt once it has dried. You can also keep water away from your paving area, as standing water can damage the surface and create potholes. Additionally, you can try parking your car in a different spot each day to help prevent indentations. This will distribute your vehicle’s weight and help the asphalt cure properly. To further protect your new paving, you can apply an asphalt sealant once it has dried.

Joints

There are several types of joints in a pavement and their construction is critical to achieving long term performance. Contraction, construction and isolation joints are most common but there are also some specialty joints like abutment and sleeper slabs that can be constructed. Load transfer across joints is primarily accomplished through aggregate interlock, dowel bars and subbase support. These joints are placed every 15-20 ft in the transverse direction and 12-14 ft in the longitudinal direction.

A paved surface with open joints is much more susceptible to spalling which occurs when the adjacent paving units are shifted in the vertical plane. It is therefore important to use a joint compound that creates a finely grained surface between the paving units and generates a significant amount of horizontal and vertical interlock to help prevent shifts.

Abutment and sleeper slabs can also be used to isolate structures within the pavement, these are typically found on bridges, roundabouts, intersections and small in-pavement structures like utilities. This type of joint uses dowels to provide load transfer, and it is typically abutted against a concrete or steel header that is constructed to allow the paving machine to continue through this section of the pavement. These joints are usually constructed with a cooled mat and a new HMA layer is then placed against the cooled edge of the previous mat, this creates a longitudinal isolation joint.

Epson Dye Sublimation Printer

If you’re looking to purchase a sublimation printer, you need to consider many factors. These include the size of your project, the frequency of printing, and the price.

This model prints onto transfer paper and fabric using dye-sublimation ink. Its compact design makes it easy to fit into smaller spaces. Contact Epson Dye Sublimation Printer now!

The Epson Dye Sublimation Printer is easy to use and maintain. Its design allows you to print high-quality graphics and images without requiring an expensive heat press. It uses sublimation dye to transfer the image onto polyester or polymer-coated surfaces. The dye is then heated by the heat transfer, which vaporizes it into a gas state that is absorbed into the material. The result is a permanent, vibrant image that won’t fade or crack over time.

This dedicated sublimation printer is perfect for businesses that want to produce soft signage and textiles. It offers fast, reliable printing and a space-saving design that makes it ideal for the workplace. Unlike a standard inkjet printer, this dye-sublimation machine uses specialized dye to produce high-quality prints. Its print head is capable of producing up to 110 square meters per hour and provides a high-resolution color gamut for stunning results.

You can also use the Epson cloud solution PORT to get a live view of your printer fleet production1. This tool is simple and easy to navigate, allowing you to maximize productivity and efficiency. It features advanced color management tools that enable you to control and improve your color workflow.

The F170 is a turnkey dye-sublimation printer that arrives with genuine Epson dye-sublimation ink technology, a 150-sheet auto-feed tray, and Mac and Windows print software. Its remarkably compact, space-saving design helps you save floor space and maximize workshop efficiency.

In addition, the F170 has a low-cost replacement ink system that ensures uninterrupted production and minimizes downtime. The system uses a hot-swap cartridge to replace an empty one, which makes the transition between print runs quick and easy. Additionally, it has a user-replaceable print head and is designed to be plugged in and run with minimal maintenance.

To keep your Epson dye sublimation printer running smoothly, you should regularly perform a maintenance check. This includes cleaning the printhead and checking for clogs. This is a task that can be forgotten easily, but it is important to remember because it can have a significant impact on your printing quality and performance. You should also print a test page once a week to make sure your printer is working properly.

High-quality prints

A dye sublimation printer uses heat to place digital images on a variety of materials, including paper and textiles. It is one of the best ways to create customized clothing and crafts, and it offers high-quality prints. It can print photos, graphics, and logos. This type of printing is ideal for boosting brand awareness, creating unique gifts, and promoting special events. Whether you’re a professional or an amateur, a high-quality dye-sublimation printer will help you create stunning and durable prints that can last for years.

If you’re looking for a top-rated sublimation printer, look no further than the Epson SureColor F170. This device promises reliable printing for numerous personalized products, including awards, mugs, and mousepads. It’s also easy to use and provides a one-year warranty and technical support. But is it worth the investment?

The most important feature of a sublimation printer is its ability to produce high-quality prints. This can only be achieved with a high-quality ink system and a good heat source. A good sublimation printer will also allow you to set your desired temperature and will automatically adjust the color output. It will also warn you when the ink is running low. It’s important to note that you should always print a test page to ensure that the ink is flowing properly. This can be easily forgotten, but it’s a simple step that can make a big difference in the quality of your final product.

When selecting a sublimation printer, it is essential to consider the scale of your project. If you’re working on smaller projects, such as mugs or phone cases, you’ll want to choose a desktop model. For larger projects, such as shirts or banners, you’ll need a wide-format model.

The Epson ET-15000 is a high-quality sublimation printer that can handle both transfer papers and directly printed fabrics. This large-format dye-sublimation printer features a high-density print chip, ensuring that your prints are sharp and vibrant. It also has a built-in cutter, which helps you save time and space. Its remarkably low operating costs and impressive color print quality makes it an excellent choice for businesses and serious hobbyists alike.

Easy to maintain

The maintenance of a sublimation printer involves regular cleaning of the print heads. This is a vital part of the printing process, as it ensures that the ink flows freely through the print head and does not dry up. This will prevent clogs, which can lead to poor prints. Generally, it is best to clean the print heads after each use. However, some printers have automatic head checking functions that run periodically to check for clogged heads and automatically clean them. The automatic head checking function may be enabled by setting a particular time in the printer’s settings.

Epson’s SureColor F170 is a sublimation printer that is ideal for small businesses and hobbyists. It offers a variety of features to make it easy for you to create professional-quality prints for a wide range of applications, including promotional products, home decor, and soft signage. The F170 also has an affordable price and one-year warranty with tech support. It is easy to use, and its high-quality print resolution makes it an excellent choice for beginners.

With a powerful PrecisionCore printhead, the SureColor F170 is an efficient and economical dye-sublimation printer that delivers vibrant prints for a wide range of media. It has a large media capacity and a compact design that maximizes workshop space. It comes with a 150-sheet auto feed tray and is compatible with both Mac and Windows operating systems. It also has a 1.6-liter ink pack system that provides superior print quality and reliability.

Its UltraChrome DS ink produces images with rich color saturation and contrast, and its nozzle verification technology is able to identify clogged nozzles without wasting ink. The F170’s CMYK color output makes it a great choice for a variety of printing applications, including textile and rigid materials. Its CMYK colors are matched with Epson’s ICC profiles, allowing it to produce accurate and consistent color matches in your designs.

If you want to start a sublimation business, it’s important to choose a printer that is easy to maintain. Look for a user-friendly interface and compatibility with popular design software. Also, consider a model with automated maintenance features that reduce downtime and repair costs. In addition, look for a printer that has an ink waste collection tank to eliminate the need for manual removal of excess ink.

Value for money

The Epson SureColor F170 is one of the best value dye sublimation printers available. It offers a high-quality print, is easy to use, and comes with a 1-year warranty. It is an excellent choice for beginner and experienced sublimators alike. It has a low cost and is suitable for a variety of applications, including sublimation printing, signage, and mugs. It also has a compact footprint, making it easier to fit in smaller spaces.

The EcoTank ET-15000 is a great option for users who want to start a small business or who need a large format sublimation printer for graphics, photos, and fabrics. This printer is the cheapest of its class and has a huge ink capacity. It uses special eco-friendly ink that is much cheaper than cartridges and lasts longer. It also has an automatic maintenance system that helps to keep your printheads clean.

In addition to its large print sizes, the Epson ET-15000 also has a built-in cutter. This feature can save you time and money by reducing waste and the number of prints that are rejected. It is also easy to set up and connect to Wi-Fi. Its quality is unsurpassed, and it is ideal for photo and graphic printing.

Unlike conventional inkjet printers, this one produces sublimation prints using heat rather than ink. This means that your prints will last for a long time, and the colors will look more vibrant than ever before. The printer can be used to print on fabric, wood, and glass. It can even print a design directly on a t-shirt.

It can be used to create a variety of items, from t-shirts to mugs and keychains. It is simple to use, with no need to buy expensive inks or specialized transfer paper. The printer comes with everything you need to get started, including a 21ml starter set of ink, Sublisure A4 paper (100 sheets), and Sawgrass software. It has a small footprint and is lightweight, so it can be placed on a table or desktop. It can print up to 753 square feet per hour.

Advantages of Hiring a Deck Builder

Building a deck requires specialized craftsmanship and experience. Professionals have strong supplier relationships and can procure premium materials at competitive prices. They also have a firm grasp of local regulations, ensuring your project adheres to permits and codes.

Ask friends and family for recommendations about reliable contractors. They can provide valuable insights into their work quality and professionalism. Contact Virginia Deck Builders now!

The cost can vary depending on the type of deck you want, the size, and the material used. However, hiring a professional can help you save money in the long run. A well-established company will have good supplier connections and can offer quality materials at reasonable prices. They also know local building codes and regulations to ensure your deck is safe and structurally sound. Besides, they can guide you on the best design and features to complement your home and lifestyle.

Aside from material costs, labor is another major expense when it comes to building a deck. Labor rates vary from one area to the next, and large cities typically have higher labor costs than rural areas. Also, the location of the deck can affect your overall price. Additional labor may be required for excavation and foundation work if it is in a hilly or remote area. The climate in your area may also require special construction methods or materials to withstand snow and rain. Finally, if your deck is going to be over a pool or garden, you may need to install additional safety measures like stairs and railings.

A well-established and reliable deck builder can offer valuable insights into your project and suggest ways to cut costs without compromising on the quality of your new deck. They also provide comprehensive follow-up services, including warranty and maintenance advice. In addition, they can give you an estimate for the entire project based on their experience and previous projects. This can help you decide whether or not to hire them. If you do, you will need to sign a contract before they start working on your project.

Time Savings

When hiring a professional deck builder, you can save time by reducing the amount of research and planning that you have to do. They’re familiar with all the ins and outs of building a deck, so they can provide you with accurate timelines and estimates for your project. They can also help you avoid unexpected expenses by staying within budget.

You can also save time by choosing a contractor with experience working on similar projects to yours. Ask potential contractors for references and testimonials from previous clients. This will give you an idea of their quality of work and professionalism.

It’s also helpful to find out how long it takes a contractor to respond to your inquiries. You don’t want to deal with a builder who takes several days to reply, as this can affect the progress of your deck project. Look for someone who aims to answer your calls and emails promptly, at the very least by the end of the business day.

Finally, it’s important to hire a professional who is familiar with local regulations and building codes. This will ensure that your deck adheres to all safety requirements and is structurally sound. A licensed contractor will be able to navigate the permit process quickly and efficiently, which can save you a lot of headaches.

Additionally, you can save a lot of time by working with a deck builder during off-peak seasons. Fall and winter are ideal times to get your deck project started because plants, trees, and grass are dormant, which minimizes the impact of construction on your landscaping. You can also take advantage of seasonal discounts offered by many deck builders to save money on your project.

Quality Assurance

Professional deck builders offer an all-inclusive service package, allowing you to rest easy knowing that your project is in good hands. They prioritize accuracy in all aspects of construction, from precise planning to coordinated execution. As a result, their extensive experience minimizes the risk of costly errors and delays. This efficiency also translates into substantial time savings, as they can complete projects within the designated timeline.

A well-established deck builder often has industry connections that allow them to acquire high-quality materials at discounted prices. This provides significant cost-savings for homeowners, and it also ensures that your outdoor living space is constructed with the best materials available in the market. Furthermore, they are aware of all the safety precautions and guidelines that should be followed during construction, ensuring your outdoor retreat is structurally sound and aesthetically appealing.

When searching for a reliable contractor, it is essential to carefully evaluate each candidate’s qualifications and track record. Online resources and personal recommendations are excellent resources for finding contractors that have a strong reputation and expertise in the field. Additionally, look for evidence of exemplary craftsmanship in previous projects to gauge the quality of workmanship that you can expect to receive from your potential contractor.

Finally, look for a deck builder who provides design consultation services to collaborate with you on your vision and objectives. They should be willing to work with you to customize your outdoor living space and meet your requirements and constraints, such as the desired size, materials, and budget. They should also provide detailed estimates, reducing the chances of any unexpected charges during the course of your project. Furthermore, a reputable deck builder will stand by their work and offer warranties or aftercare services to provide peace of mind that your outdoor living space is built to last.

Problem Solvers

Whether it’s a new deck, porch, patio or fence, the best contractor will anticipate challenges and be ready with solutions. This ensures that the project progresses smoothly and stays within budget. Professional builders also stay in regular communication with homeowners to address any concerns or issues as they arise.

When evaluating potential contractors, pay attention to their response time and the clarity of their communication. If they can’t provide you with a clear completion date or don’t return your calls promptly, it may be a red flag. Look for a company that has glowing reviews or testimonials to find out what other customers have experienced.

Local Deck Builders

A local deck builder is familiar with your city’s building codes and regulations, so they can help you avoid delays caused by unforeseen complications. They also know how to manage the permit process and inspections, saving you valuable time and ensuring that your new deck complies with all safety requirements.

One common problem that can derail a deck construction is finding and repairing underground obstacles, such as water and gas lines. These issues often require relocating or rerouting lines, which can take months to complete. A skilled deck builder will work around these issues, usually by installing a new ledger board that is attached directly over the joists. This allows a professional to inspect it for a solid connection and prevents the deck from damaging the house.

In addition to addressing unforeseen problems, a professional will also install a waterproof barrier between the deck and your house to keep moisture from seeping through and causing damage. They’ll also use galvanized or stainless-steel hardware that is rated for outdoor use and won’t rust quickly.

Accountability

During the hiring process, ask each contractor what their responsibilities and accountability are for the project. An experienced contractor will be able to answer these questions quickly and concisely.

In addition, inquire about their policy on client payments. For example, some contractors require a percentage of payment upfront and then divvy up the remaining balance over the course of construction. This practice puts the homeowner at risk of financial liability should something go wrong, such as weather or construction delays. A reputable deck builder will limit their exposure by establishing a payment schedule that aligns with milestones rather than requesting a significant amount upfront.

Local Research

One of the most effective ways to find a trustworthy deck builder is by seeking out recommendations from friends and family members who have had a positive experience with their services. You can also conduct a local search by visiting home improvement stores or lumber yards. These businesses often work closely with local builders and can provide you with valuable insights regarding the quality of their workmanship and customer service.

Ask each contractor if they are insured and bonded. Those who lack insurance and WSIB pose a huge financial liability to homeowners in the event of an accident on the job site. Furthermore, they may not be able to carry out their obligations as promised under the contract, such as meeting deadlines or delivering on certain features. A reputable contractor will have all of these details covered with comprehensive insurance and compliance with WSIB regulations. Ask each contractor to provide proof of these credentials during the interview process. This is an important step in determining whether you can trust their work and protect your investment.

Ceiling Repair – Why It’s Important to Repair Your Ceiling As Soon As Possible

A home’s ceiling goes through constant wear and tear. Reproducing damage as soon as possible is important to prevent costly structural issues.

Long, continuous ceiling cracks aren’t just unsightly; they usually indicate serious problems. They can indicate a problem with the attic joists or trusses that needs to be addressed immediately. Contact Ceiling Repair Perth now!

Cracks in a ceiling occur for a variety of reasons. Most often, they indicate normal home settling or the first signs of structural damage requiring professional care and repair. A ceiling crack’s shape, size, and location will provide clues as to what is causing the issue.

Hairline cracks along the edge of a ceiling are typically just a part of the natural aging process and are not a cause for concern. Long cracks that run across a ceiling and down a wall, however, almost always indicate serious structural damage and should be addressed immediately.

Before attempting any type of repairs, make sure you are comfortable using a ladder and that the room you will be working in is free from furniture and other objects. Lay a tarp or piece of plastic over the area you will be working to catch falling debris and make clean up easier.

Next, remove any debris that has fallen on the ceiling and sweep the floor of the room. Then, set up a ladder, making sure that you can stand on it comfortably and that all four legs are securely on the ground. Place a drop cloth underneath the ladder to catch any falling dust or paint. If the ceiling is drywall, score along the crack with a utility knife and cover it with mesh tape. Apply a thin coat of joint compound over the taped area and sand it smooth. If your ceiling is painted, you can use the same color to recoat the affected area.

Discolored cracks that are accompanied by moisture are an indicator of a water leak in the attic or plumbing problems on the floor above. Moisture damage to a building is not only damaging to the structure, it can lead to mold and mildew growth.

Long cracks that run across a ceiling, and match up with similar cracks on a wall are a sign of structural damage that requires immediate attention from a foundation professional. Such cracks can signal a number of issues including a change in the way a building settles, and that means that other parts of the building could start to shift and show signs of damage as well.

Water Damage

Water damage to ceilings can be a serious issue that needs to be dealt with as quickly as possible. It’s not only unsightly and damaging to the property, but can also lead to long-term structural issues and mold growth.

One of the first things you need to do when you discover a water-damaged ceiling is work out the source of the leak. This will help determine how much immediate repair work is needed and what the best long-term solution may be. The cause of the leak can be anything from a child’s overenthusiastic bath to more serious plumbing issues like a burst pipe. Water can travel a long way before it’s visible, so it’s important to pay attention to the signs of a leaking ceiling and act fast.

Once you’ve found the source of the leak, the next thing to do is stop the flow of water. This means shutting off the water supply if you can and placing a bucket under the drip. If the damage is severe, it’s a good idea to call in a professional to assess the situation and recommend a course of action.

When the source of the leak has been stopped, the next step is to allow the ceiling and surrounding areas to dry completely. This can be a difficult task and will likely require the use of fans and dehumidifiers to speed up the process. It’s crucial that the water-damaged ceiling and surrounding areas are dried thoroughly to avoid any further damage or mold growth.

If a section of the ceiling is badly damaged, it may need to be removed completely and replaced. This can be a complicated process that requires specialist equipment and training, but it’s essential to ensure the structure of the roof and walls is intact and water-tight.

After a thorough clean and drying of the area, it’s time to make any necessary repairs. This may be as simple as spackle and repainting if the damage isn’t too severe, but in more serious cases it could involve replacing drywall sections and installing new insulation.

Sagging

Sagging in a ceiling can be extremely dangerous, especially if it’s left unchecked. This is because a collapsed ceiling can easily cause injury to anyone in the room below, as well as extensive damage to the rest of the property and its contents. As a result, it’s essential to have any sagging in your ceiling repaired as soon as you notice it.

Sagging can be caused by a wide range of factors, including water damage, poor construction and age. In many cases, however, sagging can be addressed by identifying and addressing the underlying issue that’s causing it. For example, if you have water damage in your ceiling, fixing the leaks and repairing any damaged sections of your roof will prevent further sagging in your ceiling.

Alternatively, if your ceiling is sagging due to poor construction, a professional building inspector will be able to identify and recommend the best course of action for you. This may involve reinforcing the joists or adding additional support to the ceiling. In some instances, sagging ceilings may also require the installation of metal ceiling battens in the bottom chords of your roof trusses to increase their strength and resistance to sagging.

Another common cause of sagging is over-insulation, which can put too much pressure on the ceiling frame and joists. Different ceiling types have different load-bearing capacities, so it’s important to ensure you’re using the correct insulation for your home.

If you’re thinking about buying a new home, it’s essential to have a professional building inspection done before making an offer. This will help you to identify any potential problems with the building, such as a sagging ceiling, and can save you a lot of time and money in the long run.

As with any other home renovation project, it’s always best to leave the repair work to professionals who specialize in home restoration. These experts can provide an accurate diagnosis and execute the necessary repairs quickly and efficiently. Their knowledge of construction, structural integrity and aesthetics means they can restore your home to its former glory while ensuring it looks beautiful too.

Cracked or Peeling Paint

A fresh coat of paint can transform a ceiling and give it a brand new look, but when the finish starts to flake or peel, it can be an eyesore. It may also indicate that there are underlying problems in the home that should be addressed as soon as possible.

Cracked or peeling paint usually occurs due to moisture getting between the surface and the layer underneath. Moisture can cause the drywall to decay, so it’s important that it is sealed and prevented from coming in contact with the surface of the paint. This can be done by repairing any water damage, insulating the home, and regulating the temperature.

It’s also important to use high-quality paint to avoid this problem. Lower-quality paints don’t adhere or flex as well, so they are more likely to flake or peel. It’s also a good idea to regularly inspect your ceilings and walls for signs of moisture and to repair any leaks as soon as possible.

The first step in fixing cracked or peeling paint is to clean the area with a sponge and mild detergent. Once the area is dry, it’s a good idea to sand down any uneven areas to create a smooth and even surface for painting. After sanding, it’s recommended that you prime the ceiling with a compatible primer before repainting.

One of the main causes of paint peeling is moisture, and this can occur in specific areas around bathtubs or showers, as well as vent fans, hooks, light fixtures, or any other holes drilled into the ceiling. Using a dehumidifier and ensuring that the room is well ventilated can help prevent humidity from damaging your ceilings.

Before you start working on a ceiling, make sure you have all the necessary tools and materials. This includes a ladder, safety goggles, and a dust mask to protect yourself from the risk of injury or respiratory problems. Plastic or canvas drop cloths are also essential, as they will keep your floors and furniture protected from paint splatters. A scraper, putty knife, and a wire brush are helpful for removing loose or stubborn paint. Sandpaper is also a must, as it will allow you to smooth the ceiling before applying another coat of paint.

Mice Removal – How to Get Rid of Mice

Mice can wreak havoc on your home and property, with droppings contaminating everything from carpets to food supplies. They can also carry diseases like Hanta virus and lymphocytic choriomeningitis that are dangerous to humans.

Prevention starts with blocking entry points to your house, such as the gap between your door and frame. This can be done by packing gaps with steel wool, which mice cannot chew through. Contact Mice Removal Texas now!

Unless homeowners are able to eliminate the mice’s food sources, they will find it difficult to eradicate the infestation. Mice have sharp incisor teeth that allow them to chew through many materials, including plastic bags, so it is crucial to keep food items in glass or metal containers that cannot be chewed through. It is also important to wipe down counters and sweep floors regularly, removing crumbs and other debris that can sustain mice. Lastly, it is essential to store pet food in sealed, airtight containers and to keep bird feeders and other outdoor food sources out of the yard.

In addition to removing the rodent’s food sources, it is also important to eliminate their water source. Mice can survive for only three to four days without water. To do this, homeowners should be sure to seal any leaky faucets or other plumbing fixtures. Additionally, it is a good idea to regularly clean out trash cans both indoors and out (especially during rainy weather) and to make sure that all lids are secured.

Garages are often a prime nesting spot for mice, and they are often equipped with food, water and shelter. Homeowners can prevent this by keeping the garage tidy and removing any extra food or pet food. Additionally, it is important to remove tall weeds and clutter from the outside of the property. In addition, if there are any rodent entry points on the outside of the building, they should be sealed with caulk or steel wool.

There are many all-natural ways to deter mice from entering the home, including placing scented cotton balls with repellent oils such as peppermint or clove around the house and spraying the exterior of the house with a homemade spray that can be made using chili peppers or essential oil. There are also a variety of commercial and DIY products that can be used to repel mice, such as mouse traps that kill on contact or slowly, ultrasonic devices, and electronic repellants. However, these products may not be effective against large numbers of mice.

Seal Up Entry Points

Rodents are incredibly resourceful and can squeeze into spaces as small as 1/4″. A gap left by worn-out weather stripping or even a sliver of dirt can be a gateway for mice to invade your home.

A common way homeowners see signs of a mouse infestation is by spotting droppings or gnaw marks on walls, doors, cords, and other objects around the house. These marks are usually more pronounced on the corners of doors or baseboards, where mice are most likely to gnaw in search of places to burrow and nest.

Cracks in the foundation of older homes can also allow mice to make their way indoors. In these cases, it is often necessary to consult a mason or qualified contractor in order to repair the cracks and seal them.

It is important to note that, in addition to mice, other animals such as squirrels, raccoons, and birds can use these openings to enter your home. While these entry points are less common, they should still be taken into account when inspecting your home for possible gaps and cracks that need to be sealed.

Other possible entry points include gaps in soffits and attics, holes in the foundation, and cracked or chewed window and door frames. Also pay close attention to pipes and utility lines entering or exiting your house, as well as the attic, as these can provide easy access for rodents looking for warm and secluded places in which to live and breed.

Keeping food scraps, trash cans, and pet food in closed containers will reduce the availability of food sources that lure mice to your home. You should also clean up cluttered areas and dispose of any paper materials that may be used to build nests.

Finally, storing firewood away from your home and trimming bushes and other trees will help keep mice and other pests out of your yard. If you have a deck, it is a good idea to remove a few boards in order to complete a thorough inspection of the area for possible mouse entry points.

Humane Trapping

Mouse infestations are a common problem for homeowners. The rodents can cause a variety of issues, from food contamination and damage to property to a number of serious health concerns. In many cases, humane trapping is necessary to remove the mice and prevent their return. While it may not feel easy to kill an animal, there are a number of options available that are more humane than the traditional snap trap seen in so many films and cartoons. The best choice is to use a specialized rat trap that uses jaws made of metal or plastic rather than wood. It will also contain a sensitive trigger that will minimize the amount of force required to set the trap.

It’s also important to check the trap regularly. Mice are quick and can cause a lot of distress if they are trapped for long periods of time. It’s recommended that you check them at least every 12-24 hours so you can quickly deal with any catches before they cause more than minimal distress. If you want to avoid using a live trap there are several other options that are humane, but they’ll require more frequent monitoring as well. Some options are to use a catch and release trap, which is designed to keep the rodents safe until you can safely relocate them. Other humane traps include gas or electrocution traps that will immediately deal with the rodents without causing any unnecessary suffering.

Whenever you have caught an animal in a trap, it is important to release them far away from your home. Relocating rodents to a strange area can lead to their death as they won’t be able to find adequate food, water, or shelter and they will also likely succumb to foreign parasites or diseases against which they have no natural immunity.

The best way to do this is to put the trapped mice in a covered outdoor space that is as large as possible and ideally located some distance from other properties. Ideally, you should also clear the area of the house where the mice were found to make sure that any entry points have been sealed up properly.

Exclusion

Mice are obnoxious pests that breed and spread quickly, invading homes, restaurants, and offices to contaminate food, ruin possessions, and wreak havoc with their constant gnawing. They carry disease-causing pathogens and fleas, and can chew through electrical wires – which poses a fire risk to your home or business.

Mice can enter homes through cracks and crevices as small as a quarter of an inch. A professional pest control technician will perform a thorough inspection of your home or business, and seal up all entry points. This prevents mice from entering after the trapping process, and prevents them from re-infesting once they have been removed.

While it is important to take preventative measures to keep mice away from your home, the best method of eliminating them once they are already in your home is to use a rodent repellent. There are a variety of different types of mouse repellents available, but they can vary in effectiveness, and many require regular applications. It is important to talk with a pest control specialist about the type of repellent that is best for your property and situation.

Mouse traps are also a good option to kill mice infestations that have already taken hold. Place traps near areas where you have seen mice or have indications of a rodent problem, including nesting materials, nibbled food, droppings, and gnaw marks. Place traps in closed places, such as behind the stove and refrigerator, and in the back of drawers and cabinets.

Roofing Materials and Their Uses

Your roof is one of the hardest-working parts of your house. It defends against rain, snow, wind, heat, and cold.

There are 64 practical types of roofs in use. Often roofs need significant intervention such as the church medieval roof mentioned above which showed extensive rafter deflection requiring a lot of re-raftering.

Shingles are the most recognizable part of your roof. These decorative and sturdy shelters protect the plywood or vapor barrier beneath them from weather conditions like rain, wind and snow. They also improve your home’s curb appeal and give you more confidence in your living space.

Wooden shingles, for example, can add a classic touch to cottages, coastal homes and traditional houses. Each shingle has a unique color, shape and design to provide your house with a distinctive look that will stand out in any neighborhood. They’re also a good option for anyone who wants to preserve the natural beauty of their home, which can increase its value when it comes time to sell.

In recent years, shingle manufacturers have introduced composite or synthetic shingles that blend wood, slate and clay to create roofing materials with improved durability, strength, and resistance to weather elements. Although not as long-lasting as traditional shingles, these materials can still last for a lifetime.

A shingle’s protection is derived from the coating on its surface that reflects sunlight and keeps water off of your roof. Over time, the sun’s rays cause the coating on asphalt shingles to degrade. This is why shingles should be replaced when they’re worn out or no longer offer the level of protection you need.

The best way to extend the life of your shingle roof is to maintain proper ventilation, which includes balanced intake and exhaust and following Department of Energy recommendations for attic insulation. It’s also important to make sure you have a qualified contractor install your shingles. This is because improper exposure (the lateral distance between joints in successive courses, sometimes called stagger or edge-to-edge spacing), offset, and nail placement can lead to leaks and damage.

Leaks can occur wherever the shingle layer is penetrated, interrupted, or meets a wall. For this reason, it’s important to install flashing at these areas of your roof. Flashing is usually made of corrosion-resistant metal. If you’ve chosen closed valleys, this step is completed as shingle courses approach and run through the valleys.

Asphalt is one of the most common and versatile construction materials. It is used in road construction, roofing and paving. This is because of its waterproof and binding qualities. It is a black, tar-like, highly viscous cementitious material made of high molecular weight hydrocarbons.

Asphalts contain saturated and unsaturated aliphatic and aromatic compounds with up to 150 carbon atoms. They are found in crude petroleum and also extracted from coal or natural gas. These are then mixed with aggregates in an asphalt mixing plant to create the material that will be used for roads and other surfaces.

The material is heated to a specific temperature in order to adhere it to the aggregates and allow it to cure. This makes the pavement strong and durable. It can withstand heavy vehicle loads and resists rutting. Asphalt can be made into different grades depending on the application. For example, higher-grade asphalt can be used on airport runways and taxiways due to its ability to withstand the heavy load of aircraft tires. It is also popular for bicycle and pedestrian paths as it offers a smooth surface that is safe for walking or biking. It is even used as the preferred surface for racetracks because of its ability to handle high speeds and provide a gripping surface.

Because of its durability, constructability and ease of maintenance, asphalt is the favored paving material for city roadways. It can be built and repaired quickly, which allows for faster traffic flow and fewer delays. In addition, asphalt is low-cost and provides good value for money.

Another benefit of asphalt is its environmental sustainability. It can be recycled and used over again. It also helps to reduce air pollution since it is a good insulator and keeps heat out of buildings. It also absorbs rainwater and can help to control storm runoff. Additionally, it does not require much time to set up, which means that drivers can use newly paved roads and parking lots almost immediately after it has been put down.

Asphalt is also a popular choice for roofs, especially in colder regions. The mastic asphalt that is used for this purpose can be obtained from two sources – recycled asphalt shingles and scraps from the manufacturing of new shingle tabs or from the removal of existing shingles (known as tear-offs). The mastic asphalt that is used in roofing is usually treated with modern polymers to ensure it activates within the required temperature range and stays flexible under stress.

Flashing is a metal sheet or strips that are installed around vulnerable areas of a roof where different materials or roof components intersect. It safeguards against water penetration that can damage the underlying materials and cause leaks in walls, windows, doors and other openings. It is particularly useful in eliminating seams where a sloped wall meets a vertical surface, at the junction of two roof planes, or around protrusions such as chimneys, dormers, vent pipes and skylights.

There are many different types of flashing, each designed to meet a specific purpose and accommodate various roofing materials. The most common are step and valley flashing, which seal the joints where a shingle roof meets a vertical surface such as a chimney or dormer; counter flashing, which covers and protects the upper edge of a run of base flashing that is installed up a wall; and drip edge flashing, which helps to direct water away from the edges of shingles.

These flashings are installed over a layer of tar or other waterproof material, which is slid underneath a shingle course to help create an airtight seal in vulnerable areas. Because it is made from metal, flashing can be a durable and long-lasting part of the roofing system. However, it should be inspected regularly for signs of wear and tear that could compromise its protective function. In addition, if sections become loose or dislodged, they should be resealed promptly to prevent water intrusion.

While most flashings are metal, some may be made from other materials. These materials are typically selected based on their ability to resist corrosion and provide a long-lasting and weatherproof barrier. Flashings can be installed either in a single piece, or they can be installed like shingles, with one piece of flashing overlapping another. They can also be sealed to function as a continuous surface.

Other types of flashing include wall flashing, which is used to stop water from entering a wall through a vulnerable joint or to deflect water that has penetrated a wall back outside; cap flashing, which is placed above windows and doors to prevent leaks in these openings; sill flashing, which is installed under windows and doors to avoid moisture build-up in the wall; through-wall flashing, which spans the thickness of a wall to protect cables, supports and other features; and kickout flashing, which is found at the bottom of a wall or roof intersection to help direct water away from the structure.

Underlayment is an extra layer of protection for a roof, usually installed before the shingles are put in place. It prevents moisture from infiltrating the wood sheathing of a roof and creates an additional barrier against air and water. Without it, moisture can cause a variety of issues with your roof deck, including rot, mildew, mold and leaks.

There are several types of underlayment, though felt is the most commonly used. Felt underlayment is made from varying blends of cellulose (natural plant fibers), polyester and bitumen. It’s durable, easy to work with and fairly inexpensive. It can also withstand high winds, which is useful for wood shingle roofs. However, it tends to absorb water, which causes wrinkling and can telegraph through to the roofing material. This can lead to premature failure of the roof-covering product. Felt underlayment should be saturated with asphalt to increase its resistance to water absorption.

Non-bitumen synthetic underlayment is a popular alternative to felt underlayment. It’s a tough, waterproof material that can withstand high winds and heavy snow loads. It can also be fastened with metal or plastic caps, which are typically used in high-wind areas and for certain types of roof-covering products. Synthetic underlayment is also resistant to fungal growth and won’t wrinkle as much as felt underlayment. It’s available in a wide range of thicknesses, from 7.5 mil to 30 mil, and has an ASTM rating for its durability.

While the National Roofing Contractors Association (NRCA) recommends using underlayment, it’s not required for every steep-sloped roof. If your client chooses to skip the underlayment, they should make sure that the roof-covering manufacturer and local building codes and climate zones require it. In addition, the NRCA recommends that you check with a professional roofing contractor to ensure proper installation.

If you see underlayment installed incorrectly, your best course of action is to contact the homeowner and explain that improper installation can void their roof-covering warranty. Suppose you suspect a home was built without underlayment. In that case, you can use the NRCA’s roofing manuals and online resources to determine if the sheathing was a suitable building material for that region’s climate zone.